₨ 99 Per Square Feet


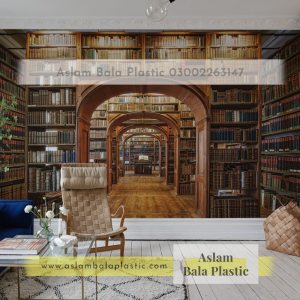
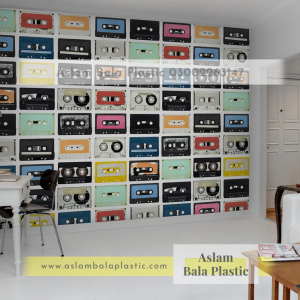
Premium Self-Adhesive Wall Mural Vinyl Sheet
Transform any wall into a stunning visual masterpiece.
Our Wall Mural Vinyl Sheets combine the elegance of wallpaper with the durability of PVC canvas, easy to apply, long-lasting, and designed to instantly refresh any space.
-
High-Definition Mural Quality
Printed on premium PVC canvas vinyl for crisp, vibrant colors and a textured finish that feels like real artwork.
-
Water-Resistant & Durable
Engineered with upgraded thickness, moisture protection, and anti-fade technology, perfect for long-term indoor use.
-
Easy to Maintain
Simply wipe with a damp cloth to keep your mural looking new.
-
Quick DIY Installation
Peel-and-stick adhesive makes application effortless, no glue, no mess, and no bubbles with proper installation.
-
Suitable for All Smooth Surfaces
Ideal for:
– Painted walls
– Cemented/plastered walls
– Glass & mirrors
– Wooden panels
– Metal surfaces
– PVC boardsUse it in living rooms, bedrooms, offices, shops, studios, cafés, and more.
-
Comes in Panels for Easy Installation
– Large mural designs are delivered in pre-cut vertical panels (similar to premium wallpaper strips).
– Each panel aligns seamlessly with the next.
– Panels ensure accurate scaling, easier handling, and bubble-free installation.
– Makes large murals possible without stretching, shrinking, or misalignment.
How to Measure
Measuring for your mural is simple. Follow these steps to determine the exact size you need.
1. Measure the Width
Measure your wall from left to right (in feet).
This is your Mural Width.
2. Measure the Height
Measure your wall from top to bottom (in feet).
This is your Mural Height.
3. Add Extra for Safety
Add 1 inch on each side to allow for trimming and perfect alignment.
4. Multiple Walls / Sections
If your mural spans multiple areas, repeat the measurements and add all lengths together.
5. Inches to Feet Conversion
If measuring in inches:
Inches ÷ 12 = Feet
Installation Guide
Installing your wall mural is simple, even for beginners.
✔ Step 1: Prepare the Surface
Make sure the wall is smooth, clean, and dry.
✔ Step 2: Peel & Position
Peel a small portion of the backing from the top, align carefully, and begin applying.
✔ Step 3: Apply Slowly
Use a plastic squeegee/card to press firmly and remove air bubbles as you move downward.
✔ Step 4: Trim the Edges
Use a sharp cutter to trim excess material for a clean, professional finish.